Which model is right for me as a recording engineer?

Recording engineers, check out Edwina, Mabel, or Evelyn.

Mabel is a multi-pattern studio condenser. Try her on her own or with an Edwina for a great sounding mid-side mic configuration.

Edwina is a versatile workhorse microphone that sounds fantastic in the studio and has the added bonus of being able to be used live onstage. She’s our signature model, and much beloved by her fans. A matched pair of Edwinas can go a long way in a studio— try them on vocals, acoustic instruments, guitar amps, and drum overheads.

Evelyn, our newest model, is a weirdo and very cool looking. She’s perfectly spaced for the ORTF stereo recording technique, with all the warmth and versatility that people love in the Edwina.

STILL HAVE QUESTIONS?

Feel free to email us questions about your specific application and we can make a tailored recommendation for which mic will work best for you.

I’m not in the U.S.— how can I buy one?

We have some wonderful international dealers— see our Resellers page for more info. You are welcome to purchase from any of our dealers, or directly from us as we ship internationally via our webshop. Keep in mind that we don’t collect Duty and VAT ourselves; those will be assessed by your local authority when the mic arrives and we do not include those charges in our price. If our website has any trouble calculating the best price on international shipping, please email us (sales@eartrumpetlabs.com) with the model(s) you are interested in, your preferred delivery address, and  your phone number so we can prepare you a shipping estimate and an invoice.

Which side of the mic is the front?

Good question. This is something that’s not necessarily intuitive when you first start working with your Ear Trumpet mic, and that’s okay! Once you figure it out you’ll feel like you’re in a secret club of great sounding performers.

front-vs-back-01.png

On the models with silver faceplates (Edwina, Edna, Myrtle, Delphina, and Evelyn) the silver screw heads are visible on the front of the microphone (faces the performer or sound source) and the brass nuts are on the back (faces the audience in a live setting).

On the mics made out of tea balls (yes, those were originally intended for loose leaf tea), the front is the side without a screw in the middle of the ball, and the back is the side with the screw.

front-vs-back-02.png

The Mabel has perhaps to most subtle indicator of all— the screw on the copper body of the microphone indicates the back. The Omni indicator (O) on the top of the mic should be on the left-hand side, and the Figure-8 indicatior (8) should be on the right.

So if you’re rushing to set up for a show and something doesn’t sound quite right, or there’s a bit more feedback than normal— double check that the mic isn’t backwards. It happens to the best of us.

(We’ve had people tell us that ours was the best-sounding mic on stage— even backwards!)

Do they need Phantom Power?

Yes. All condenser microphones need phantom power to operate. In situations with a PA or house sound it should be a non-issue since virtually all mixing boards provide phantom power. However, musicians toting their own combo amp or portable PA to small venues need to make sure they have phantom power for their mics. If your system doesn’t provide phantom power (most newer ones do) it means you will have to carry a small external phantom supply and one extra mic cable. Phantom power supplies are inexpensive and commonly available. They are simple devices and don’t affect tone, so any reasonably sturdy one should do just fine. Even if you don’t bring your own vocal PA, sometimes things break, or don’t work as advertised, so it’s usually a good idea to keep that phantom box in your gig bag just in case.

Our mics require at least 24V of phantom power. Less than that won’t hurt them, but they may perform erratically. We sell one we like from Rolls ourselves (see below) but any 24V or more phantom power adapter will do!

-

 
rolls-front-300_edited-1.png

Rolls PB23 Phantom Power Adapter

Rolls single-channel 48 volt phantom power supply. We like the build quality of this model, and the fact that it's American-made like our mics.


Why use condenser mics for live performance?

 
circle philip-01.png

by Philip Graham
owner/bricoleur of Ear Trumpet Labs

I spend a lot of time thinking and talking to people about why I’m building condenser microphones rather than dynamics. The short answer is, I like the sound better, and I think when designed right condensers can be as good for live use as any mic out there.

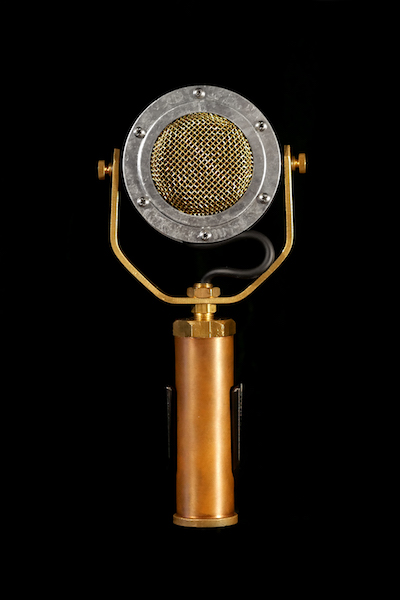
Even though condenser mics are getting wider and wider use in live sound, there remains a common prejudice among many performers that dynamics are somehow inherently better for live use. Usually there’s a belief that dynamics resist feedback better and control bleed from other parts of the stage; coupled with an attitude that any differences in sound won’t matter through a PA. Well, differences between mics are very audible in live settings, especially with modern sound systems. I’ve heard a singer in a jazz club with a modest newer PA switch for one song from my Edwina to a standard 58 that was set up at the piano, and the change was unmistakeable – unmistakably worse. Would you really not care what amp you use for your guitar because it will “probably sound terrible through the PA anyway”?

As for feedback and bleed, it’s all a matter of what the specific microphone is designed for, and how well it is implemented. Both are entirely controlled by the frequency response and polar pattern (directionality) of the mic, and especially the polar pattern across the frequency response. Most people look at polar patterns at 1K, which is in the middle of the mic’s response; but for feedback control the microphone really has to have the same off-axis rejection all across its response range. However, the polar pattern is never the same at all frequencies (except for a ribbon mic’s figure-8 pattern). Almost always, the high frequencies have worse directional control – and it’s usually the high frequencies that are the most problematic for feedback. Taming the off-axis high frequency response can be done through acoustic adjustments to the capsule and careful design of the headbasket, as well as controlling overly-hot high frequencies in the overall EQ of the mic circuitry. I make all these adjustments in my mics, and they have gain-before-feedback that is directly comparable to common stage dynamics like a Shure 58 or an Audix OM5, even in tough acoustic environments.

The big advantage of condenser mics is their sound. A well-built condenser capsule is inherently more capable of a smoother response through the full frequency range than a dynamic. This is simply due to the physics of their construction. The moving part of a dynamic capsule, which is driven by the sound in the air being captured, must have much more mass than the diaphragm of a condenser capsule. It will be much more difficult to make it respond to high frequencies, and it will have severe resonant peaks and valleys at various frequencies. A good dynamic capsule is very carefully designed to add a whole series of these acoustic resonances together, which combine to give a fairly smooth response. But it’s still inherently more irregular and “peaky” than a condenser and less responsive at very high frequencies. Worse high-frequency response is the same as saying that it reproduces transients less accurately. There are certainly some fantastic-sounding dynamics out there – many of which are designed for the studio and are no more appropriate on stage than a U87. But at any rate, a dynamic capsule is a complex mechanism engineered to work in a specific microphone body and cannot very effectively be transplanted and modified, whereas I can control almost every aspect of the sound of my condenser mics.

All of this was brought home for me recently when Ear Trumpet Labs provided the microphones for the Portland Old Time Music Gathering. These were all-acoustic performances; these musicians care a lot about having the tone and quality of their instruments faithfully reproduced – they’d all much rather be completely unamplified, just playing in your living room. The Ear Trumpet mics were mostly used from a distance, usually with Josephine or Louise set up as a conventional bluegrass single mic, with Edwinas and Ednas available for spot micing instruments that needed it, or when the group was spread too far to the sides for the single mic to pick up everyone. Normally these performers are used to using a large-diaphragm condenser intended for studio use; they need the sensitivity and accuracy such a mic gives, but usually they can’t use stage monitors at all with such mics. The Ear Trumpet mics gave them the best of all worlds – the sensitivity to work from a distance, the accuracy to sound completely transparent, and the feedback rejection to be able to monitor. You really can have both great quality sound and the feedback rejection to make stage use easy – not to mention great looks!

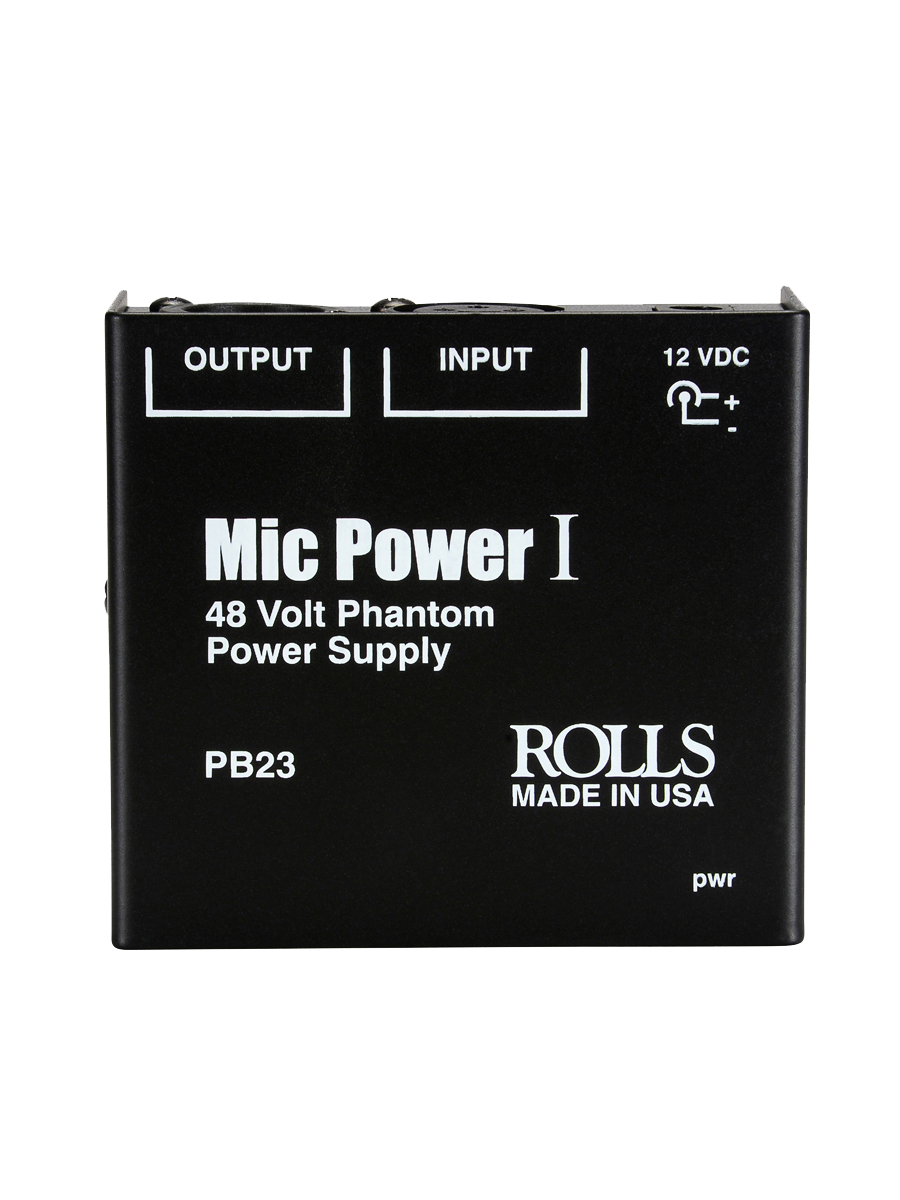
Condensers mics need phantom power to operate— see this FAQ for more.


Shop Our Top Single Mics


GOT QUESTIONS?

Feel free to get in touch!

503-974-4147
info@eartrumpetlabs.com

2117 NE Oregon St. #303
Portland, OR 97232

Does my mic need repairs?

We offer a lifetime warranty on our microphones, and are happy to repair yours in our workshop if anything has gone amiss. Email us and we can coordinate return shipping.

Before you do, though, you might want to check a few things first. Most often, when a customer is having an issue with their new mic, it’s the result of a faulty XLR cable. We recommend testing your mic with a couple different cables to rule this out as a problem.

If you just got your mic and you can’t get it to respond at all, make sure you are using phantom power. If the response just isn’t what you were expecting sonically, check that the mic is facing the right way.

If none of that seems to help, definitely reach out! We want to make sure your mic is working great for you.

What supplemental gear works with ETL mics? (mic clip, pop filter, XLR cable, mic stand, etc)

CLIPS

Our mics fit in standard Shure clips that you would use for a 58 and we include one with every order. They can be a bit tough to snap on – you can’t slide them in because of the flange at the bottom of the mic – but the Shure clips are really unbreakable and very secure once you snap the mics in.

POP FILTER

Most of our mics are designed to be used from far enough away that a pop filter isn’t typically necessary, but if you’re a singer who likes to be right up on the mic, we’ve designed a pop filter for the Edwina, which can help to limit the impact of plosives. See the product page here.

WINDSCREEN

We make our own hand-knit windscreen for our various models available here! If you’re a knitter or can wrangle a knitter into making you things, we also provide the knitting pattern free of charge on Ravelry. They’ll be so excited to make something other than socks and sweaters!

If you have additional gear you’ve found that works well with your Ear Trumpet mic, please let us know! We’d love to compare notes.

PHANTOM POWER SUPPLY

All condenser microphones need phantom power to operate. In situations with a PA or house sound it should be a non-issue since virtually all mixing boards provide phantom power. However, musicians toting their own combo amp or portable PA to small venues need to make sure they have phantom power for their mics. Even if you don’t bring your own vocal PA, sometimes things break, or don’t work as advertised, so it’s usually a good idea to keep that phantom box in your gig bag just in case. Our mics require at least 24V of phantom power. Less than that won’t hurt them, but they may perform erratically. We sell a Rolls single-channel 48 volt phantom power supply. We like the build quality of this model, and the fact that it's American-made like our mics, but any 24V or more phantom power adapter will do!

XLR CABLE

To connect our microphone to a PA for live use or an interface for recording, you’ll need an XLR cable. We sell a braided XLR cable by DiMarzio that we like for its style and durability.

MIC STAND

We tend to like any solidly built boom-style mic stand, and we’re fans of an Atlas or a TAMA brand stand.

Shop Accessories

What’s the deal with single micing?

Jason Mraz & Raining Jane with Louise

Jason Mraz & Raining Jane with Louise

by Philip Graham, owner/lead engineer of Ear Trumpet Labs

One of the great pleasures of playing in an acoustic band is gathering with other players and feeling the resonance and harmony of all the instruments and voices working together in that close acoustic space. When playing for a larger audience sound reinforcement is really necessary, but you can keep that acoustic essence by gathering around a single mic in the traditional bluegrass style.

Many players run into some problems with this approach with modern PA systems and sound engineers. Partly it’s a matter of expectations: the technique originated as a way to get a little more volume from essentially acoustic performances, so a band could be heard in a larger hall – any increase in volume was a win, and audiences were used to the sound of unamplified instruments. These days a lot of engineers and even audiences approach performances with an expectation of much higher volume levels and get frustrated when they can’t achieve them with this technique. Ear Trumpet Labs mics can help a lot, but it’s important to understand limitations and some techniques to get the best results.

The first point to understand is that the distance from your instrument or voice to the mic is your first place to control gain. The sound level is always quieter at the mic than at the instrument, and it drops with the square of the distance. So it’s twice as quiet from one foot as from six inches away, and twice again as quiet at two feet. In order to get the same signal level in the PA, the preamp has to add that much gain back— without feedback. The farther you are from the mic, the harder it will be to get the same volume from the mains without running into feedback. So the first best technique is to really work on being able to pay close to each other and to the mic. Many people place the mic too high, getting it needlessly far from instruments like the guitar and banjo, especially if vocals aren’t a major part of the band’s sound. Picture lengths of string from each sound source to the mic, and try to balance them all and keep them all as short as possible. One foot makes a big difference.

Brandi Carlile with Myrtle

Brandi Carlile with Myrtle

The best tool for controlling feedback is using the directionality of the mic’s pickup pattern. Our Ear Trumpet Labs mics are all cardioid pattern, as are most large diaphragm condensers. The main advantage of ETL mics is that the pattern stays controlled through the whole frequency range. In a cardioid pattern, the mic has its full sensitivity in the central 30 degrees in front of the mic; by next 30 degrees, or 60 degrees from directly in front, the level has fallen off 3db; by 90 degrees (at the side of the mic) the level has dropped 6db, or in half, and is dropping very rapidly. By 30 degrees around to the back side of the mic the sensitivity is much lower, and is at its lowest directly backwards. To fight feedback you want the greatest contrast between the sensitivity directed towards your instruments and that directed towards anything coming from the PA. So keep your players to the front of the mic, ideally all within the 60 degree arc. Place your louder instruments to the sides and the quietest in the center. Keep the mic at least some distance behind the main speakers, and keep your monitor (you should only need one) a little distance behind the mic (from the band’s point of view) – don’t put the monitor right at the foot of the mic stand.

The last thing to watch out for is the one you usually have the least control over, and that is reflections and bounce-back in the room. Any sound getting back to the mic from the PA is a potential source of feedback, and low ceilings and close, reflective back walls can bounce sounds right back from the speakers. If you can get curtains or a backdrop behind you on stage, it will help a lot. Sometimes it can pay to play with angling the mic a little up or down to get its peak sensitivity away from a problematic surface.

The single mic technique can be really rewarding in conveying a truly accurate, warm acoustic sound to a large audience. However, performers most commonly use large-diaphragm condenser mics that are really intended for the studio because of their sonic accuracy and sensitivity to capture instruments at a distance. But using mics not designed for the extreme feedback rejection needed on a live stage can be problematic. Many modern LDCs have a quite hyped high end that can be beneficial in the controlled environment of a studio, but on stage it not only makes feedback control difficult, it doesn’t sound very natural. With ETL mics, some care, and practice, you can not only get great natural acoustic sound at better volume than you ever hoped, you can even get effective monitoring on stage, which most performers never imagined they could get with this technique.


Shop Our Top Single Mics


Got Questions?

Feel free to get in touch!

503-974-4147
info@eartrumpetlabs.com

2117 NE Oregon St. #303
Portland, OR 97232