guide

Which side of the mic is the front?

Good question. This is something that’s not necessarily intuitive when you first start working with your Ear Trumpet mic, and that’s okay! Once you figure it out you’ll feel like you’re in a secret club of great sounding performers.

front-vs-back-01.png

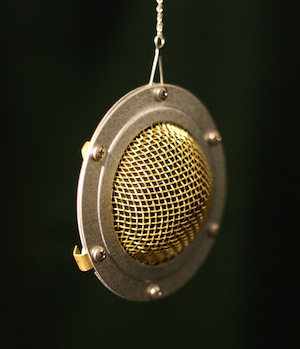
On the models with silver faceplates (Edwina, Edna, Myrtle, Delphina, and Evelyn) the silver screw heads are visible on the front of the microphone (faces the performer or sound source) and the brass nuts are on the back (faces the audience in a live setting).

On the mics made out of tea balls (yes, those were originally intended for loose leaf tea), the front is the side without a screw in the middle of the ball, and the back is the side with the screw.

front-vs-back-02.png

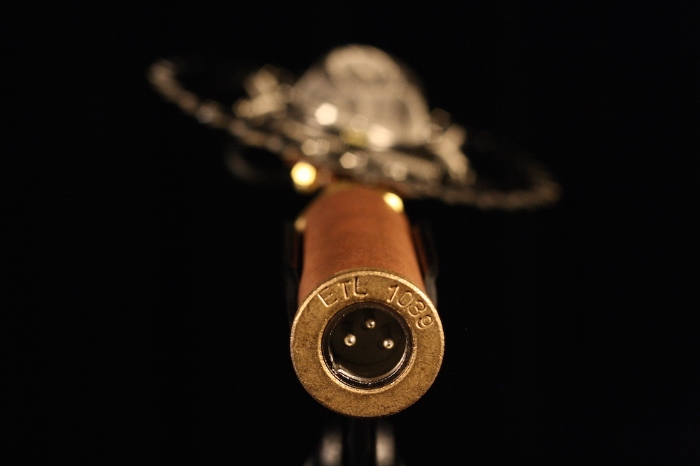
The Mabel has perhaps to most subtle indicator of all— the screw on the copper body of the microphone indicates the back. The Omni indicator (O) on the top of the mic should be on the left-hand side, and the Figure-8 indicatior (8) should be on the right.

So if you’re rushing to set up for a show and something doesn’t sound quite right, or there’s a bit more feedback than normal— double check that the mic isn’t backwards. It happens to the best of us.

(We’ve had people tell us that ours was the best-sounding mic on stage— even backwards!)

Do they need Phantom Power?

Yes. All condenser microphones need phantom power to operate. In situations with a PA or house sound it should be a non-issue since virtually all mixing boards provide phantom power. However, musicians toting their own combo amp or portable PA to small venues need to make sure they have phantom power for their mics. If your system doesn’t provide phantom power (most newer ones do) it means you will have to carry a small external phantom supply and one extra mic cable. Phantom power supplies are inexpensive and commonly available. They are simple devices and don’t affect tone, so any reasonably sturdy one should do just fine. Even if you don’t bring your own vocal PA, sometimes things break, or don’t work as advertised, so it’s usually a good idea to keep that phantom box in your gig bag just in case.

Our mics require at least 24V of phantom power. Less than that won’t hurt them, but they may perform erratically. We sell one we like from Rolls ourselves (see below) but any 24V or more phantom power adapter will do!

-

 
rolls-front-300_edited-1.png

Rolls PB23 Phantom Power Adapter

Rolls single-channel 48 volt phantom power supply. We like the build quality of this model, and the fact that it's American-made like our mics.


Does my mic need repairs?

We offer a lifetime warranty on our microphones, and are happy to repair yours in our workshop if anything has gone amiss. Email us and we can coordinate return shipping.

Before you do, though, you might want to check a few things first. Most often, when a customer is having an issue with their new mic, it’s the result of a faulty XLR cable. We recommend testing your mic with a couple different cables to rule this out as a problem.

If you just got your mic and you can’t get it to respond at all, make sure you are using phantom power. If the response just isn’t what you were expecting sonically, check that the mic is facing the right way.

If none of that seems to help, definitely reach out! We want to make sure your mic is working great for you.

What supplemental gear works with ETL mics? (mic clip, pop filter, XLR cable, mic stand, etc)

CLIPS

Our mics fit in standard Shure clips that you would use for a 58 and we include one with every order. They can be a bit tough to snap on – you can’t slide them in because of the flange at the bottom of the mic – but the Shure clips are really unbreakable and very secure once you snap the mics in.

POP FILTER

Most of our mics are designed to be used from far enough away that a pop filter isn’t typically necessary, but if you’re a singer who likes to be right up on the mic, we’ve designed a pop filter for the Edwina, which can help to limit the impact of plosives. See the product page here.

WINDSCREEN

We make our own hand-knit windscreen for our various models available here! If you’re a knitter or can wrangle a knitter into making you things, we also provide the knitting pattern free of charge on Ravelry. They’ll be so excited to make something other than socks and sweaters!

If you have additional gear you’ve found that works well with your Ear Trumpet mic, please let us know! We’d love to compare notes.

PHANTOM POWER SUPPLY

All condenser microphones need phantom power to operate. In situations with a PA or house sound it should be a non-issue since virtually all mixing boards provide phantom power. However, musicians toting their own combo amp or portable PA to small venues need to make sure they have phantom power for their mics. Even if you don’t bring your own vocal PA, sometimes things break, or don’t work as advertised, so it’s usually a good idea to keep that phantom box in your gig bag just in case. Our mics require at least 24V of phantom power. Less than that won’t hurt them, but they may perform erratically. We sell a Rolls single-channel 48 volt phantom power supply. We like the build quality of this model, and the fact that it's American-made like our mics, but any 24V or more phantom power adapter will do!

XLR CABLE

To connect our microphone to a PA for live use or an interface for recording, you’ll need an XLR cable. We sell a braided XLR cable by DiMarzio that we like for its style and durability.

MIC STAND

We tend to like any solidly built boom-style mic stand, and we’re fans of an Atlas or a TAMA brand stand.

Shop Accessories

What’s the deal with single micing?

Jason Mraz & Raining Jane with Louise

Jason Mraz & Raining Jane with Louise

by Philip Graham, owner/lead engineer of Ear Trumpet Labs

One of the great pleasures of playing in an acoustic band is gathering with other players and feeling the resonance and harmony of all the instruments and voices working together in that close acoustic space. When playing for a larger audience sound reinforcement is really necessary, but you can keep that acoustic essence by gathering around a single mic in the traditional bluegrass style.

Many players run into some problems with this approach with modern PA systems and sound engineers. Partly it’s a matter of expectations: the technique originated as a way to get a little more volume from essentially acoustic performances, so a band could be heard in a larger hall – any increase in volume was a win, and audiences were used to the sound of unamplified instruments. These days a lot of engineers and even audiences approach performances with an expectation of much higher volume levels and get frustrated when they can’t achieve them with this technique. Ear Trumpet Labs mics can help a lot, but it’s important to understand limitations and some techniques to get the best results.

The first point to understand is that the distance from your instrument or voice to the mic is your first place to control gain. The sound level is always quieter at the mic than at the instrument, and it drops with the square of the distance. So it’s twice as quiet from one foot as from six inches away, and twice again as quiet at two feet. In order to get the same signal level in the PA, the preamp has to add that much gain back— without feedback. The farther you are from the mic, the harder it will be to get the same volume from the mains without running into feedback. So the first best technique is to really work on being able to pay close to each other and to the mic. Many people place the mic too high, getting it needlessly far from instruments like the guitar and banjo, especially if vocals aren’t a major part of the band’s sound. Picture lengths of string from each sound source to the mic, and try to balance them all and keep them all as short as possible. One foot makes a big difference.

Brandi Carlile with Myrtle

Brandi Carlile with Myrtle

The best tool for controlling feedback is using the directionality of the mic’s pickup pattern. Our Ear Trumpet Labs mics are all cardioid pattern, as are most large diaphragm condensers. The main advantage of ETL mics is that the pattern stays controlled through the whole frequency range. In a cardioid pattern, the mic has its full sensitivity in the central 30 degrees in front of the mic; by next 30 degrees, or 60 degrees from directly in front, the level has fallen off 3db; by 90 degrees (at the side of the mic) the level has dropped 6db, or in half, and is dropping very rapidly. By 30 degrees around to the back side of the mic the sensitivity is much lower, and is at its lowest directly backwards. To fight feedback you want the greatest contrast between the sensitivity directed towards your instruments and that directed towards anything coming from the PA. So keep your players to the front of the mic, ideally all within the 60 degree arc. Place your louder instruments to the sides and the quietest in the center. Keep the mic at least some distance behind the main speakers, and keep your monitor (you should only need one) a little distance behind the mic (from the band’s point of view) – don’t put the monitor right at the foot of the mic stand.

The last thing to watch out for is the one you usually have the least control over, and that is reflections and bounce-back in the room. Any sound getting back to the mic from the PA is a potential source of feedback, and low ceilings and close, reflective back walls can bounce sounds right back from the speakers. If you can get curtains or a backdrop behind you on stage, it will help a lot. Sometimes it can pay to play with angling the mic a little up or down to get its peak sensitivity away from a problematic surface.

The single mic technique can be really rewarding in conveying a truly accurate, warm acoustic sound to a large audience. However, performers most commonly use large-diaphragm condenser mics that are really intended for the studio because of their sonic accuracy and sensitivity to capture instruments at a distance. But using mics not designed for the extreme feedback rejection needed on a live stage can be problematic. Many modern LDCs have a quite hyped high end that can be beneficial in the controlled environment of a studio, but on stage it not only makes feedback control difficult, it doesn’t sound very natural. With ETL mics, some care, and practice, you can not only get great natural acoustic sound at better volume than you ever hoped, you can even get effective monitoring on stage, which most performers never imagined they could get with this technique.


Shop Our Top Single Mics


Got Questions?

Feel free to get in touch!

503-974-4147
info@eartrumpetlabs.com

2117 NE Oregon St. #303
Portland, OR 97232

Can I use Ear Trumpet Labs mics with a tower array PA like Bose L1?

We have worked with a number of artists using these tower array systems like the Bose L1 or the Fishman SA330x. There are a lot of benefits to these portable systems, and they have great sound quality that suit our mics well. The main thing to keep in mind, though, is that when condenser micing the claim that you can have the column behind you without concern for feedback is not true, especially if you're single micing which can require a large amount of gain. Having a mic with the sensitivity and gain to give decent volume to an instrument 3 feet away, pointed at a reproducing speaker only an additional six feet away in the same direction, is never going to work. However, people have had success placing the column just about level with the mic, not too close, especially if they can angle the mic a bit away from the column. Generally you can then hear yourself well enough from the edge of the column's pattern, but the mic and the speaker are both in areas of lower sensitivity with respect to each other, so you can get the volume out to the room pretty high. You can also add a floor monitor out in front of you for added volume on stage.

cq5dam.web.320.320.png

What mic clips do you recommend?

We make our own Copper Mic Clip and Brass Shock Mount if you’d like a hand-made clip that matches the aesthetic of your microphone.

Our mics also fit in standard plastic Shure A25 clips that you would use for a 58 and we include one with every order. They can be a bit tough to snap on – you can’t slide them in because of the flange at the bottom of the mic – but the Shure clips are really unbreakable and very secure once you snap the mics in. If you lose yours or need a spare, let us know and we’re happy to sell you another for $5 plus shipping.


Brass Mic Clip

All-metal mic clip for style, precision, and peace of mind

$40

Copper Shock Mount

Cut vibrations from stage rumble and mic stand noise

$75